Connecting your website with WinSCP is a quick and secure process. Follow these three steps to start managing your content: [1]
1. Secure your connection details: To establish the link, you will need your account credentials. Usually, these are the same ones you use for cPanel. If you prefer to create exclusive access, you can do so from the FTP Accounts section in your control panel.
1.1. Host: Your domain name (e.g., your-domain.com) or your server's IP address.
1.2. User: Your main username or the specific FTP account username (example., user@your-domain.com).
1.3. Password: The password assigned to that user.
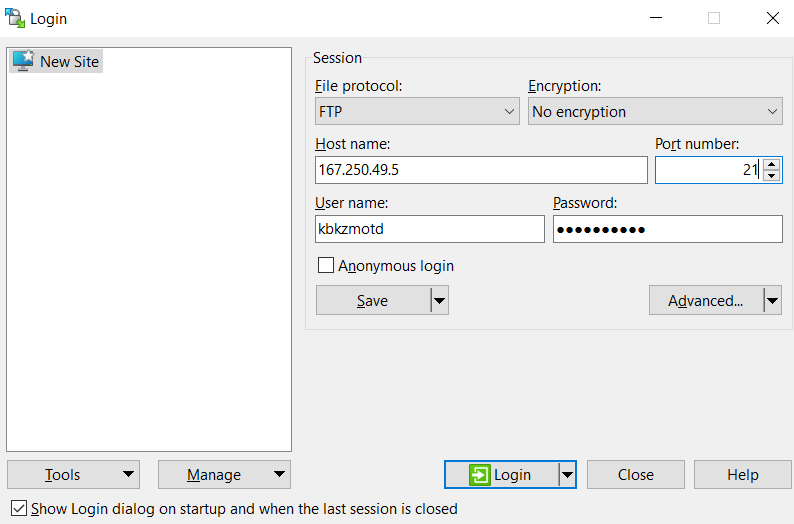
2. Configure your WinSCP session: Launch the application and, in the New Session window, fill in the following fields for an optimal connection:
2.1. File protocol: Select SFTP (recommended for its high security) or FTP for standard connections.
2.2. Encryption (FTP only): We suggest choosing Explicit TLS Encryption to guarantee the protection of your information.
2.3. Host name: Enter your domain or IP.
2.4. Port:
• Use 21 if you chose FTP.
• Use 22 (or the specific port assigned by your provider) if you chose SFTP.
2.5. User and Password: Enter the details you gathered in the first step.
3. Start the file transfer
3.1. Click "Login" (or Connect). If this is your first time connecting, it is normal for a security warning about the "host key" to appear; simply click "Yes" or "Accept" to validate the server.

3.2. You can drag the files from the side of your documents to the cPanel files panel to upload them to the corresponding folder.
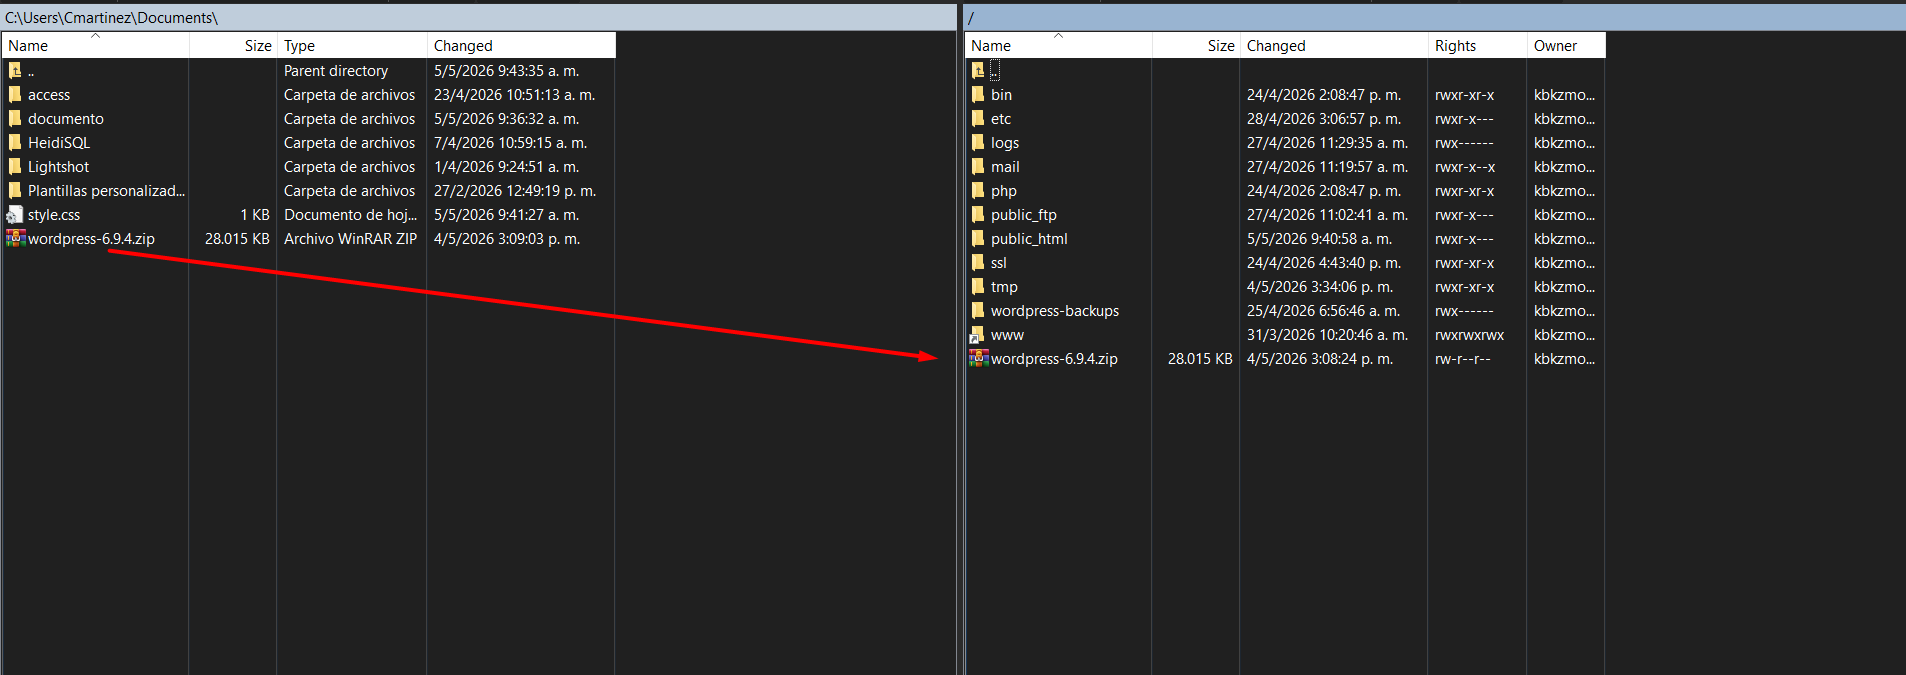
Done! You will now see your computer's files on the left and your server's files on the right. Remember that the public_html folder is the primary destination where your website resides.
